Setting up the Google Client ID (Since v8.0)
You need to setup the Google Client ID so that Celoxis can connect to your Google drive.
To obtain a Google Client ID:
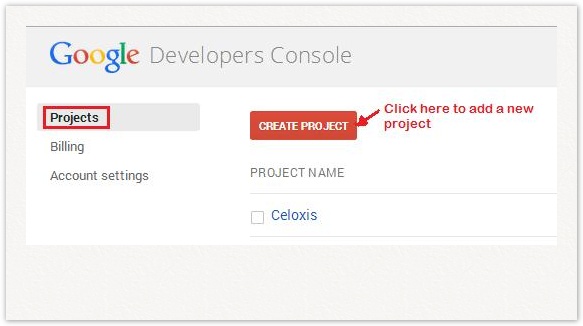
Go to the Google Developers Console.
Create a new project with a suitable name say 'Celoxis' from under the Projects tab on left.
Now, click on the new project you created.
From the left panel, select APIs & auth.
In the list of APIs shown, make sure that the status is ON for the Drive API.
Again, from the left panel, select Credentials.
Click on Create New Client ID.
In the the pop-up, do the following
- Select Application Type as Web Application.
- Under Authorized JavaScript origins, enter the URL you have entered as the Celoxis URL. (Under Settings > Site. Click on Edit Site Settings). For example https://acindia.acme.com:8843/
- Click on Create Client ID.
- A client ID will be created. This ID needs to be now added to your Celoxis account as mentioned below.
To add your Google Client ID:
- Login as administrator user.
- Navigate to Settings > Site. Click on Edit Site Settings.
- In the new pop-up, enter the ID under the text box for Google Client ID.
- Click on Save.
- Restart the application for the changes to take effect.
For some common issues, refer here.