Outgoing mails (Notifications)
These settings are used by Celoxis to deliver notifications like the task assignments, Request Progress updates, etc.
- Go to Administration > Site Settings > Edit Site Settings.
- Under the Outgoing Mail tab, set the following:
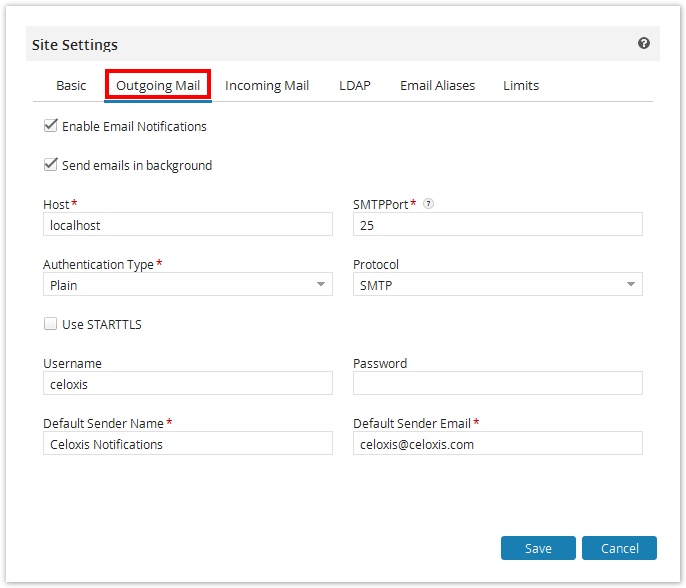
- The Enable Email Notifications must be checked for sending/receiving email notifications from Celoxis.
If the result of any action causes emails to be delivered, then the email delivery takes place before the action is completed and control returned to the user. The rationale is that in case of any errors the user is notified right then and there. If however, your mail server is slow in delivering emails, you can select this option so that the emails will be delivered in the background, thus improving performance for the end users.
- The Send emails in background option should be checked for better performance. This send the emails in background without waiting for the response and hence improving performance.
- The Host is the name of your server on which mail server is installed. It can be the IP address or server name of the machine.
You can write localhost if you are going to install Celoxis on the same machine where you have your mail server setup.
- Enter the appropriate SMPT Port number of SMTP.
- Select the appropriate Authentication Type from the drop-down.
- Select appropriate Protocol from the list.
- The UserName will be the name of your email account. In our example, celoxis@domainname.com is the mail account name and hence, the Login name is celoxis.
- The Default Sender Name you enter will be the name used for the notifications sent from Celoxis. You can enter that as per your choice.
- Save and Restart the application for the changes to be affected.
If this is setup correctly, you will receive all the notifications sent by Celoxis. In case you have issues, please refer here.